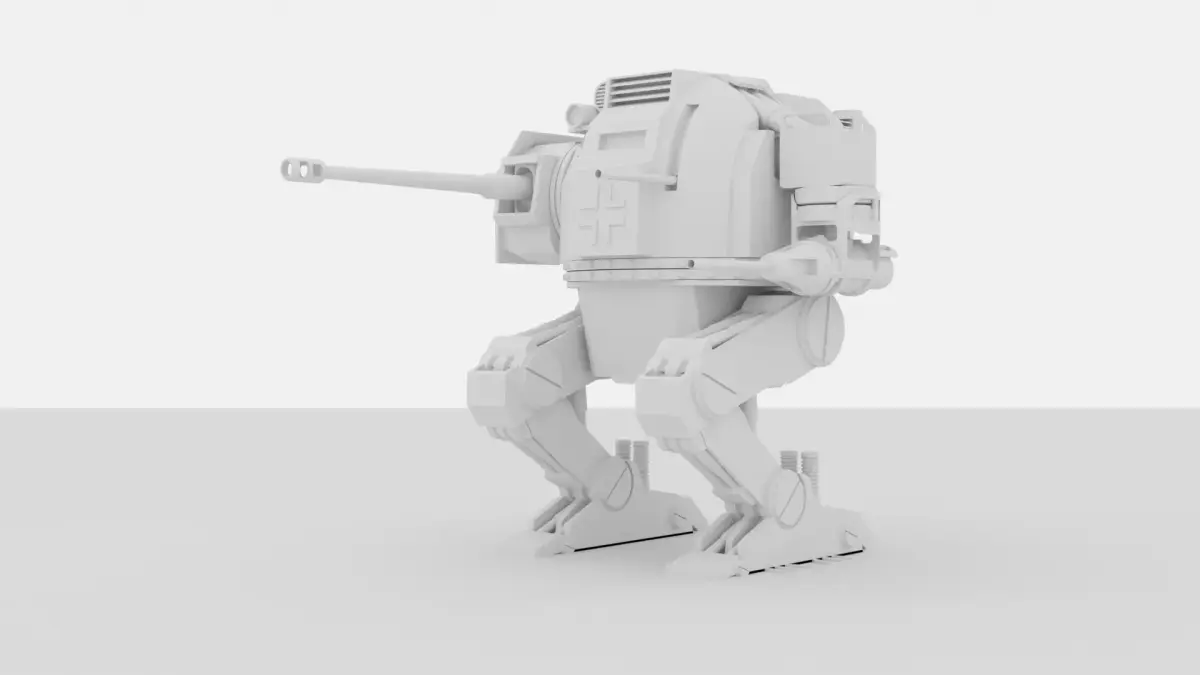
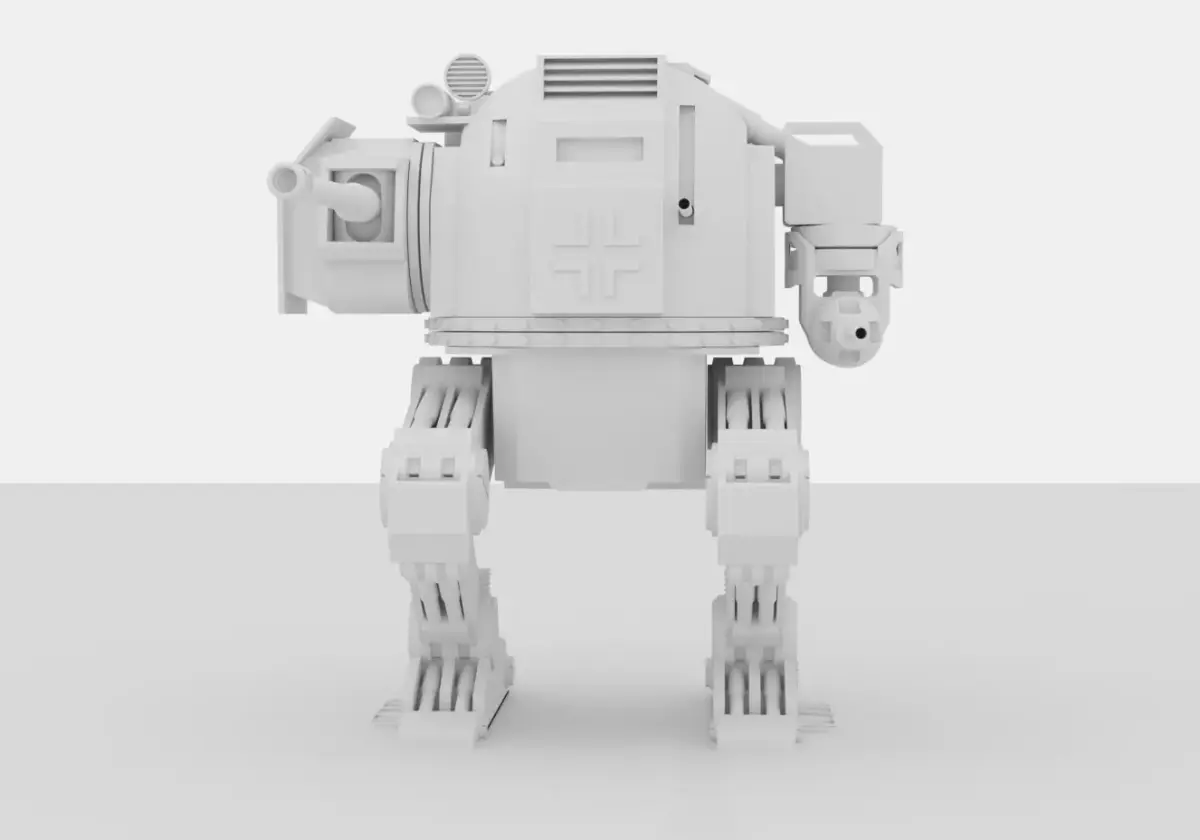
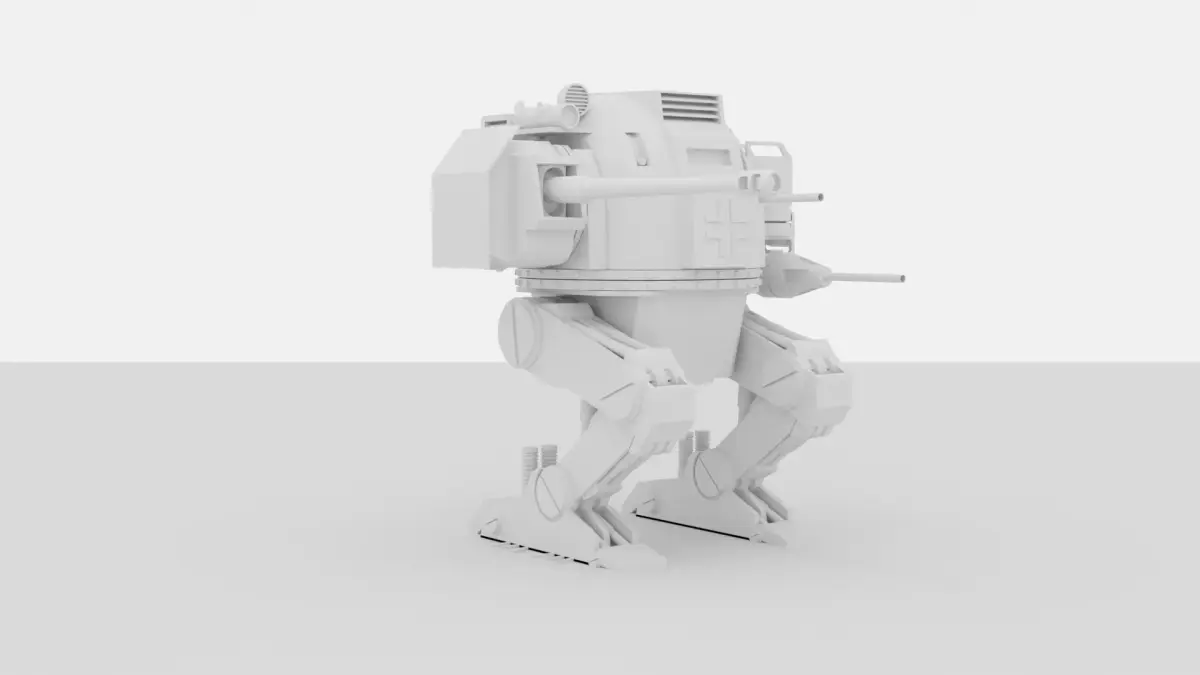
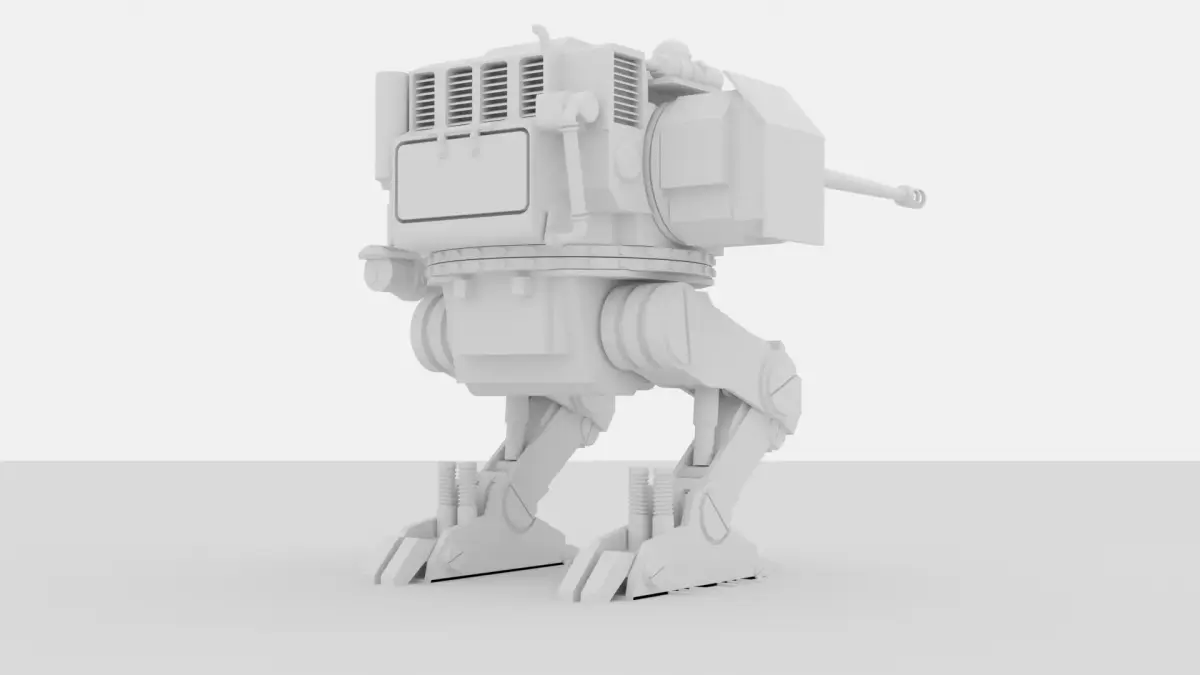
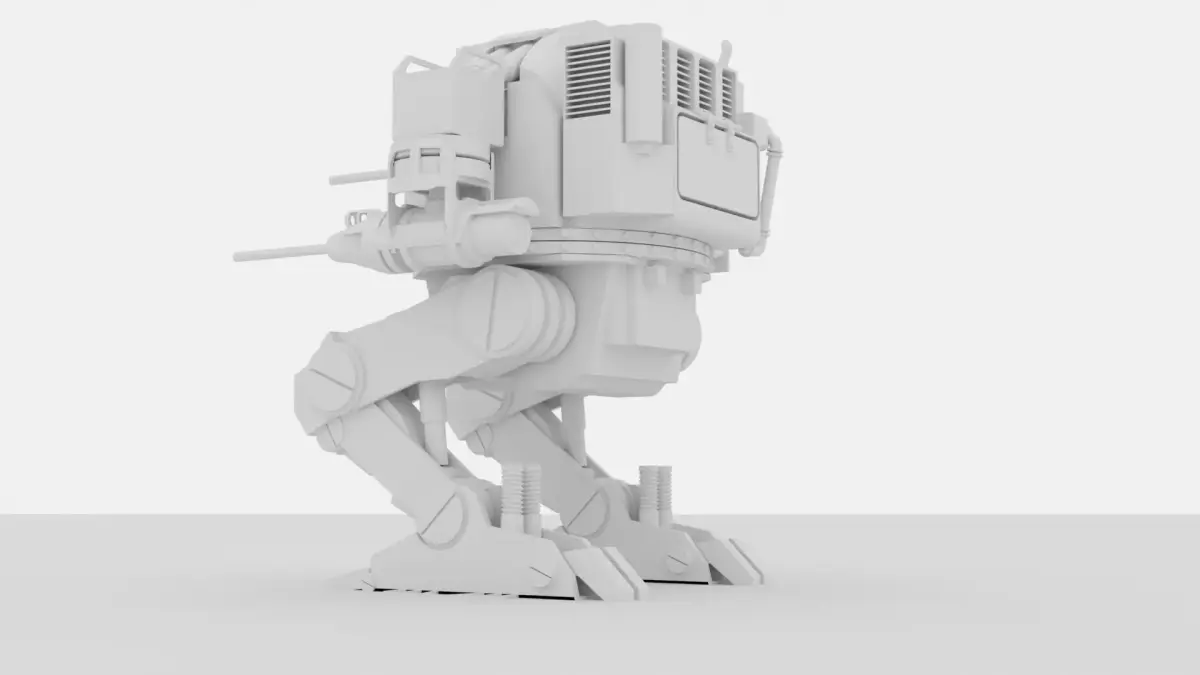
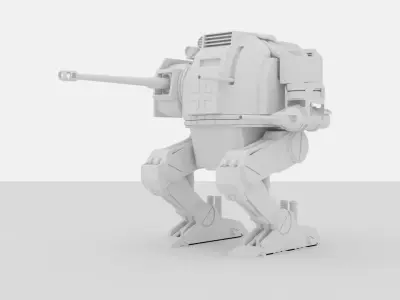
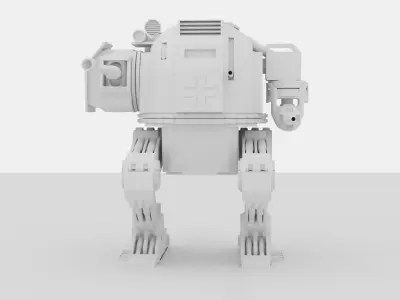
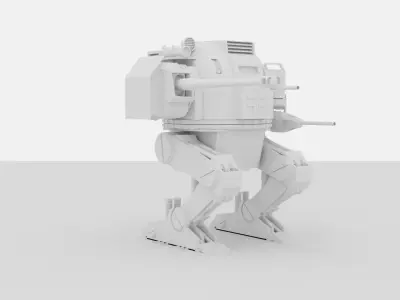
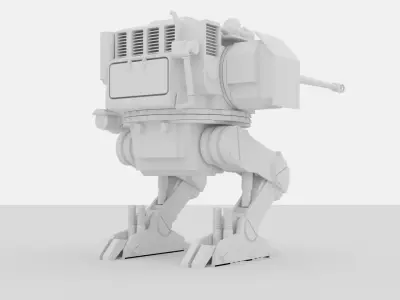
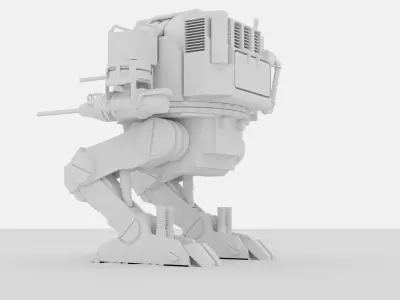
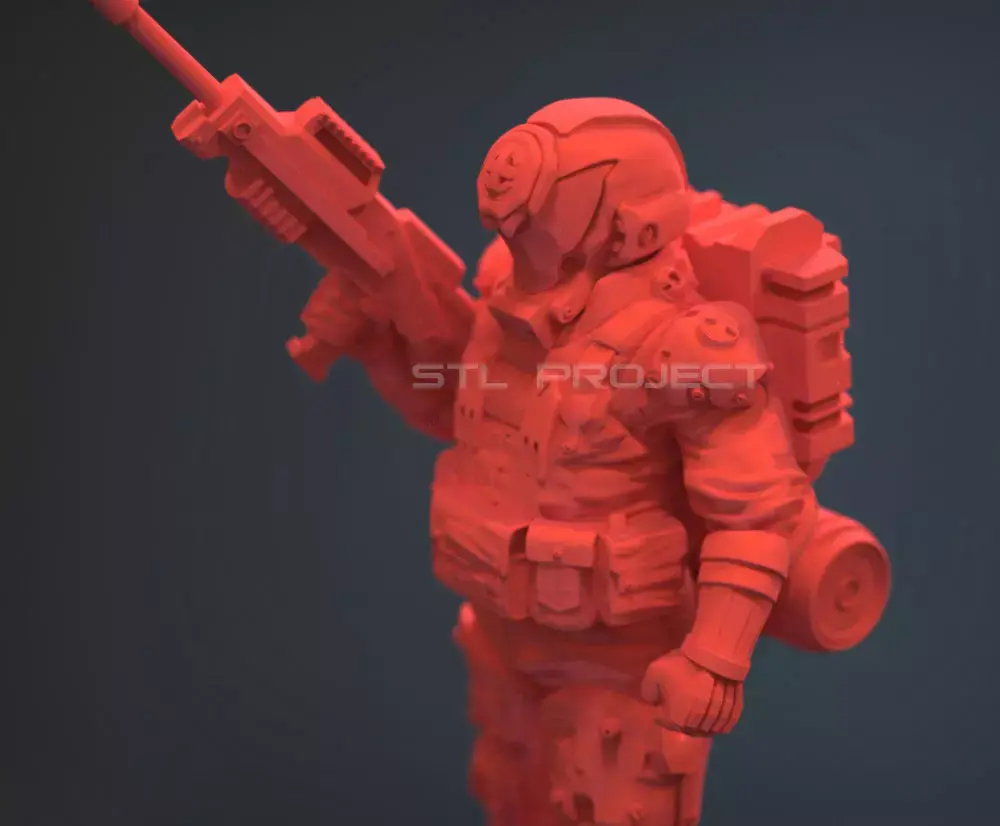
Overview
This is an original 1/35 scale WWII German-inspired fictional combat mech designed specifically for 3D printing.The design is entirely original and does not represent or promote any real-world political ideology.The model has been split primarily for FDM printing.While resin printing is possible, the parts were not specifically divided for resin workflows.The pose is fixed (non-articulated) to maintain clean proportions and stable assembly.Some parts require adhesive for assembly. Please use super glue or rubber cement as needed.
Printing Information
Scale: 1/35File Format: STL
Pre-split for easier printing (FDM-oriented separation)
Designed primarily for FDM printers
Resin printing possible depending on printer settings
Supports are NOT included
Supports should be generated in your preferred slicer (e.g., Cura, PrusaSlicer, Chitubox).
Design Notes
This is a static display model (non-articulated).The fixed pose allows:Clean surface presentationSolid part connections after assemblyEasier finishing and painting
Ideal for:
DioramasScale model displaysCustom painting projectsWWII-inspired sci-fi or alternate history collectionsImportant
This product is a digital STL file.No physical model will be shipped.
assembly guide:
Important Notes:Some parts may require adhesive for secure assembly. Use super glue or rubber cement as needed.If you are unsure about assembly, refer to the included complete model file for guidance.Minor sanding or trimming may be required depending on your printer settings.Supports are NOT included; generate supports in your slicer if needed.
Step 1 – Left LegPrint parts labeled L-LEG 1, 2, 3 and two L/R leg piston (print 4) parts.Glue parts 1 and 2 (the leg halves) together.Attach part 3 (foot) to the assembled leg.Attach the two L/R leg piston (print 4) parts to the cylinders at the back of the foot.
Step 2 – Right LegRepeat Step 1 using the parts labeled R-LEG.Glue the leg halves and foot, then attach the two pistons to the cylinders at the back of the foot.
Step 3 – BodyPrint Body 1, 2, 3, 4 and Gun barrel for Body.Glue Body 1 and Body 3 together, making sure the protrusions on part 3 face outward.Attach the protrusions of Body 2 without using glue.Attach Body 4 into the shorter vertical groove.Insert the Gun barrel for Body into the longer vertical groove.
Step 4 – Left ArmPrint L-hand parts (4 pcs), L-arm parts (3 pcs), Gun barrel for Arm (1 pc), and L-arm piston.Insert the L-arm piston into the long groove on the upper left side of the body.Insert the protrusion of L-hand 1 into the round hole on the left side of the body.Glue L-arm 1 and L-arm 2 together, then attach them above the L-arm gun.Connect L-hand turn 1 and L-hand turn 2, then insert into L-arm 1, 2 with the small protrusions facing inward, and glue.Attach the completed L-arm assembly to the L-hand.Insert Gun barrel for Arm into the hole at the end of the L-arm gun.
Step 5 – Engine PipePrint Engine pipe 1 and Engine pipe 2.Glue Pipe 1 to the rear right side of the body.Glue Pipe 2 to the right end.
Step 6 – TurretPrint Turret 1, 2, Turret shield, and 75mm gun barrel.Glue Turret 1 and Turret 2 together.Attach the Turret shield to the side of the turret, matching its shape.Insert the 75mm gun barrel into the central round hole and rotate for movement.Attach the completed turret assembly to the body.
Step 7 – Night VisionPrint Night vision 1, 2, 3.Glue Night vision 1 to the upper right side of the body.Attach Night vision 2 to the end of the pipe.Glue Night vision 3 to the left side of the body.
Tips:Check part labels carefully before assembly.Dry-fit all parts before applying glue.Refer to the complete model file for reference.Minor adjustments may be required depending on your printer and settings.
STL (Stereolithography, filesize: 31.1 MB)